March 27-30 Menu and Weekly Shopping List tested March 19-22

Menu

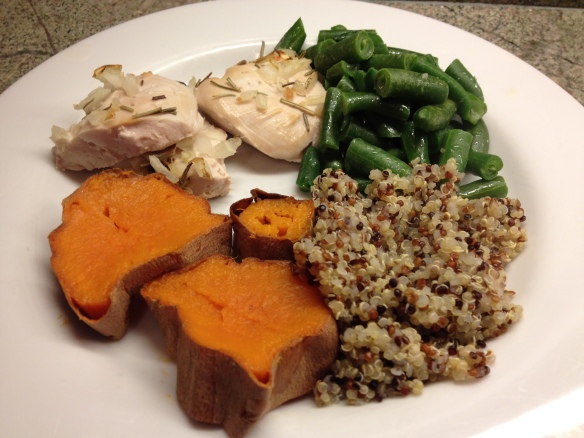
Monday – Rosemary Garlic Chicken, Quinoa, Green Beans, and Sweet Potato Rounds

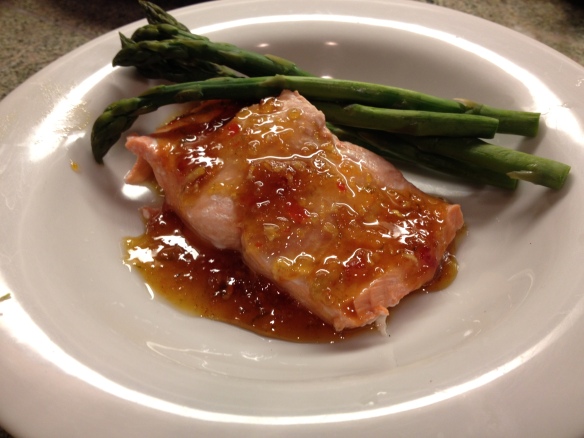
Tuesday -Quick Salmon with Citrus Chili Glaze, Asparagus, and Side Salad

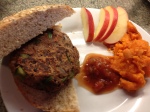
Wednesday – Black Bean Burgers on Whole Wheat Buns; Mashed Sweet Potatoes and Apple Slices

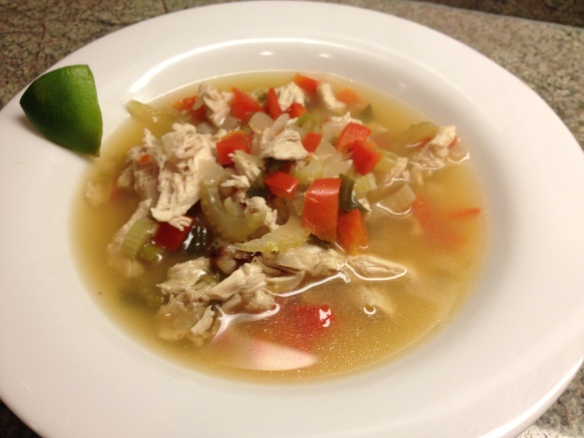
Thursday – Asian Chicken Soup

Despite what the pictures suggest, these meals are fast, easy, healthy, and delicious! Aside from baking the sweet potatoes on Monday morning while I got the kids ready for school, I did not do much pre-prep – these recipes are so easy, you won’t have to either!    Try them, your family will love them!

Recipe

Rosemary Garlic Chicken, Quinoa, Green Beans and Sweet Potato Rounds

Rosemary Garlic Chicken and Brown Rice, Green Beans and Sweet Potato Rounds

Serves 2 adults and 2 kids plus 3 lunches

Rating: 9

Ingredients

1 sweet potato

canola oil spray

1.5 lbs. boneless, skinless chicken breast

3 garlic cloves, minced

2 t rosemary

1 C quinoa

3/4 t salt, divided

3 C frozen or fresh green beans

2 t butter or margarine

Instructions

Make Ahead:

Preheat oven to 375

1. Wash sweet potatoes, poke potato skin with a fork to make a few holes, and bake for 45 minutes. Store in refrigerator until ready for use.

Dinner Prep

Pre-heat oven to 375

1. Wash and cut chicken and put in lightly sprayed roasting pan.

2. Spread minced garlic over all of the chicken and sprinkle rosemary over a 1/3 of the chicken.

3. Pop in the oven for 15-20 minutes.

4. Make quinoa according to package directions.  It should be ready as the chicken is coming out.

5. Cook green beans in the microwave, or on the stove top.  Portion on plates.

6. Cut sweet potato into rounds (leave skin on).  Warm and portion on plates.

7. When Chicken is ready (clear juices when cut, and meat springs back to the touch), portion on plate with quinoa.

8. Serve and smile knowing Thursday’s meal and several lunches are in the bag!

Pre-Prep Opportunities

1. Bake sweet potatoes and/or chicken a day ahead – when you have time.  Store in refrigerator until ready to use.

Recipe

Salmon with Citrus Chili Glaze, Asparagus, and Side Salad

Salmon with Citrus Chili Glaze, Asparagus, and Side Salad

Serves 2 Adults and 2 Kids

Rating: 9.5

Ingredients

1 bunch asparagus, washed, and hard stem broken off

1/2 C rice wine

1/4 C rice wine vinegar

2 stalks  lemon grass, outer layers removed

3 T chopped onion

1 T minced garlic

juice and zest of 1 orange and 1 lime

1/4 C sweet chili sauce

4 quarter-size slices fresh ginger

4  5 oz. pieces Pacific salmon

1 t thyme

Instructions

1. Boil water in deep pot. Hopefully the same pot and water can be used to steam the fish.

2. Blanche asparagus in boiling water for 3 minutes.  Turn off heat, remove asparagus from water and cool with cold water and ice. Set aside.

3. Re-use boiled water for fish.  Bring water to a boil again.  This should not take long.

4. Meanwhile, boil rice wine and rice wine vinegar until reduced by half.

5. Mince t T lemon grass, cut the rest into 3 in. strips.

6. Add minced lemon grass to rice wine mixture, reduce heat to medium and then add onion, garlic, juices and zest. Cook 3 minutes. Add chili sauce and cook until thickened, about 20 minutes.

7. As sauce cooks, prepare the side salad and portion on each plate.

8. While the sauce is still cooking, put lemon grass stalks and ginger in the steamer which should be boiling now.

9. Place fish on lemon grass/ginger and sprinkle thyme on top. Cook, covered, until just opaque in center, 8 minutes.

10. Spoon some sauce in the bottom of your serving bowls. Place salmon on top and finish with a generous drizzle of sauce.

Pre-Prep Opportunities

1. Blanche asparagus up to a day ahead.  Store in refrigerator until ready to use.

2. Make chili sauce up to a day ahead. Store in refrigerator until ready to use.

Recipe

Black Bean Burgers on Whole Wheat Buns; Mashed Sweet Potatoes and Apple Slices

Black Bean Burgers on Whole Wheat Buns, Mashed Sweet Potatoes, and Apple Slices

Source: Principalchef.com

Serves 2 adults and 2 kids plus ~3 lunches

Rating: 9

Ingredients

2 sweet potatoes

1 T butter

2 Apples

1-2 carrots

1 15 oz. can black beans

1/4 t chili powder

1/4 t salt

1/2 t cumin

1/2 C whole wheat flour

3 green onions finely chopped or 1/4 C chopped onion

1 bell pepper, finely chopped

1 C salsa

1 C bread crumbs or gluten-free equivalent

Pinch Salt


Instructions

1.  Pull remaining cooked sweet potatoes out of the refrigerator and peel skin off while they are still cold. Set sweet potato “meat” aside.

2.  Slice and steam carrots until soft.

3. Combine carrots and black beans and mash with potato masher.

4. Add remaining ingredients (except sweet potato, butter, or apple these make up your side dishes).  If you need to thicken up the patty mixture, add more bread crumbs; If it’s too thick, add more salsa.

5. Shape into patties. (depending on how big you make them you can get 6-8 patties,  I got 8.)

6. Cook on a lightly sprayed griddle on medium heat for 3-4 minutes per side or until a little crisp on the outside. You can cook on the grill but you may want to do on an iron skillet or another grill friendly surface just to make sure they stay in one piece.

7. While the patties are cooking, warm the sweet potatoes with 2 t butter or margarine and a pinch of salt. Portion across plates.

8. Slice an apple and divide among plates.

9. Put on a bun (or 1/2 of a bun or even a 1/4 of a bun), add your favorite condiments, and you are living the vegetarian dream.

Pre-Prep Opportunities

1. Make the sweet potatoes ahead of time. Store in refrigerator until ready to use.

2. Make the bean mixture ahead of time and form into patties.  Store in the refrigerator until ready to use.

Recipe

Asian Chicken Soup

Asian Chicken Soup

Serves 2 Adults and 2 Kids

Rating: 9.5

Ingredients

3/4 C white or brown rice, cooked

6 C Chicken Stock

1 minced onion

2 carrots chopped

1/2 C chopped celery

1 lb. chicken, cooked and shredded

1/4 C Braggs Liquid Amino Acids

2 slices of ginger, about the diameter of a nickel

one half lime, juiced

one half lime, cut into 4 pieces, for garnish

Instructions

1. Make rice up to a day ahead and store in refrigerator until ready to use. Try to use brown rice if making ahead as it has more nutrients than white rice.

2. Put chicken stock in a soup pot.

3. Add remaining ingredients except for limes reserved for garnish.

4. Bring to a boil and serve!

Pre-Prep Opportunities

1. Make rice up to a day ahead and store in refrigerator.

2. Make entire recipe ahead of time and store in refrigerator.  Let the flavors marinate!

3. Hopefully the chicken was cooked earlier in the week so all you had to do was shred it. Otherwise cook the chicken ahead of time and store in refrigerator.

Shopping List

Entrees

2.5 lbs. boneless skinless chicken breasts

1.25 lbs. Salmon

Vegetables

3 sweet potatoes

1 bunch asparagus

4 garlic cloves

1 onion minced

2 stalks lemon grass

1″ piece fresh ginger

3 green onions, chopped (or 1/4 C chopped onion)

4 carrots, chopped

1 bell pepper, chopped

1/2 C chopped celery (optional, only if you already have it left over from something else)

Fruit

1 orange

2 limes

1-2 Apples

Dry Goods

canola oil spray

salt, pepper

2 t rosemary

1 C quinoa

3/4 C brown rice or white rice

1/2 C rice wine

1/4 C rice wine vinegar

1/4 C sweet chili sauce

1 t thyme

1 T sesame seeds

1/2 C whole wheat flour

1/4 t chili powder

1/4 t salt

1/2 t cumin

1 15-oz Can Black Beans, Drained

1 Cup Salsa (Thicker is Better)

1 Cup Bread Crumbs

6 C Chicken Stock

1/4 C Braggs Liquid Amino Acids

Dairy

3 T butter

Frozen

10 oz. pkg green beans

March 19-22 Weekly Menu, Tested Mar 12-15

Monday: Shake n Bake Chicken, Peas and Side Salad

Tuesday: Salmon Burgers, on Thin Whole Wheat Buns, Grilled Vegetables

Wednesday: Squash with Kidney Beans, Feta, Leftover Grilled Vegetables and Pasta Sauce

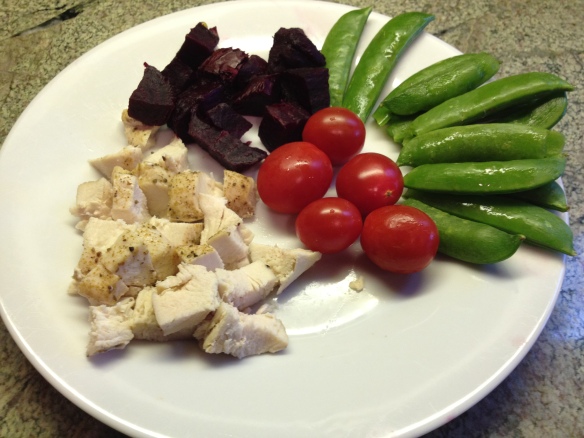
Thursday:  Old Bay Chicken, Beets, Sugar Snap Peas, and Cherry Tomatoes

Recipe
Shake n Bake Chicken Fingers, Peas, and Side Salad

Ingredients
1 C bread crumbs

3/4 T paprika

1 t salt

1/2 t garlic powder

1/2 t minced onion

1/4 t pepper

A good sprinkle of basil, parsley, and oregano

1.75 lbs. boneless, skinless chicken breasts

4 C salad greens

1 tomato

3 C frozen peas

Instructions

Pre heat oven to 375

1. In a shallow bowl, mix bread crumbs, paprika, salt, garlic powder, minced onion, pepper, basil, parsley, and oregano.

2. Rinse chicken, cut into 2″ – 3″ pieces, and dredge through the bread crumb mix, covering both sides. Place on half of a lightly sprayed roasting pan. Squeeze pieces together in necessary.

3. Rinse chicken for Thursday as well.  Cut into 2″ – 3″ pieces and place on the other half of the roasting pan. Sprinkle Old Bay Seasoning on top. Squeeze pieces together in necessary.

4.  Pop pan in the oven for about 20 minutes or until done (chicken will spring back to the touch and the juices will be clear.)

5. Rinse beets for Thursday. Place on a lightly sprayed roasting pan (or line the pan w foil) and cook for about 40 minutes or until a fork can pierce the beet.

6. While the chicken is cooking, portion greens and make a small side salad on each plate, topping with your favorite salad toppings.

7. Go through the mail and flip through one of the catalogs, help with homework, or make a phone call.  You will have a little down time.

8. As the chicken gets closer to doneness, warm the peas in the microwave.

9. Place Thursdays chicken in a container and store in the refrigerator. When beets are done, store them in the refrigerator as well.

10. Serve and relax!

Prep Opportunities

1. Wash and cut the chicken ahead of time and store in refrigerator until ready for use.

2. Wash and cut greens and toppings for salad.


Recipe

Salmon Burgers, on Thin Whole Wheat Buns, Grilled Vegetables

Ingredients

4 salmon burgers (fresh or frozen)

whole wheat buns

1 onion, cut into rings

2 zucchini, sliced long ways

1 bell pepper cut into strips

canola oil spray

pinch salt

Condiments for burger

Earth n Vine’s Red Bell Pepper and Ancho Chili Jam

Favorite mustard

Or your favorite condiment

Instructions

1. Place cut vegetables on a lightly sprayed roasting pan, spray vegetables, sprinkle a pinch of salt, and cook in oven for 15 minutes.

2. Turn grill on high or heat lightly sprayed skillet over medium high heat.

3. Place salmon burgers on heat. Turn down heat to medium – low on grill and medium on stove top.

3. Cook burgers 4 minutes a side or until cooked through.

4. Portion greens for a salad and top with your favorite toppings.

5. Put mustard on one side of the bun, and the chili jam on the other.  Add burgers.  Portion grilled vegetables and serve.

6. No, easy is not cheating!

Pre-Prep Opportunities

1. Wash and cut veggies.  Store in refrigerator until ready to cook.

Recipe

Squash with Kidney Beans, Feta, Leftover Grilled Vegetables, and Pasta Sauce

Ingredients

1 squash, halved lengthwise and seeded
2 tablespoons vegetable oil
1 onion, chopped
1 bell pepper diced
1 clove garlic, minced
1 1/2 cups chopped tomatoes
3/4 cup crumbled feta cheese
1 can black beans, drained
1 jar spaghetti sauce
2 tablespoons chopped fresh basil
Parmesan or manchenga cheese (optional)

Instructions
Pre heat oven to 350

1. Cut squash in half, remove seeds and place face down on a lightly sprayed baking sheet.

2. Bake for 30 minutes or until a fork can be inserted easily through the skin.

3. While squash is baking, take out the leftover grilled vegetables from the night before. Cut into bite sized pieces. Set aside in a microwaveable container.

4. Pour sauce into sauce pan.

5. Cut tomatoes into small chunks, rinse the beans, add both to sauce and heat until warm.

6. Tear basil into pieces and set aside.

7. Remove squash from oven, and set aside for a few minutes.

8. Warm grilled vegetables in microwave (or on stove top).

9. Score inside of squash and scoop out.   Portion into bowls.

10. Top squash with sauce mixture and grilled vegetables, Finish with a sprinkle of feta cheese and basil.

11. Serve and enjoy this warm, hearty, savory vegetarian dish!

Pre-Prep Opportunities

1. Bake squash.

2. There is very little left to do since the veggies are already cooked!

Recipe

Old Bay Chicken, Beets, Sugar Snap Peas, and Cherry Tomatoes

Ingredients

1.75 lbs. boneless skinless chicken breast

Old Bay seasoning

2 bunches beets

3 C sugar snap peas

Instructions

1.  Rinse sugar snap peas and drain.

2. Hopefully the chicken and beets were cooked on Monday.

3.  Take them out of the refrigerator and warm.

4.  Portion chicken, beets, and snap peas.

5. Serve.  OK, if it is this easy, maybe it is cheating…

Pre-Prep Opportunities

1. If you followed the weekly menu, there is no pre-prep left!


Shopping  List

Entrees

3.5 lbs. boneless, skinless chicken breasts

4 salmon burgers (fresh or frozen)

Dry Goods

1 C bread crumbs

3/4 T paprika

1 t salt

1/2 t garlic powder

1/2 t minced onion

1/4 t pepper

A good sprinkle of basil, parsley, and oregano

canola oil spray

pinch salt

Condiment for Salmon Burger: Earth n Vine’s Red Bell Pepper and Ancho Chili Jam and your favorite mustard, or whatever other condiment sounds good.

2 tablespoons vegetable oil

1 can black beans, drained

1 jar spaghetti sauce

Old Bay seasoning

Vegetables

4 C salad greens

1 tomato

1 onion, cut into rings

2 zucchini

1 bell pepper

1 squash, halved lengthwise and seeded
1 onion, chopped
1 bell pepper diced
1 clove garlic, minced
1 1/2 cups chopped tomatoes
2 tablespoons chopped fresh basil

2 bunches beets

3 C sugar snap peas

Frozen

3 C frozen peas

Bakery

whole wheat buns

Dairy

3/4 cup crumbled feta cheese

Parmesan or manchenga cheese (optional)

Have Your Cake and Eat it Too

BBQ Chicken wraps in tortillas with mangos and blueberries

Tonight I had my cake and I ate it too.  I don’t mind cooking – when I have time – and with my schedule, that is not very often…  So tonight I served a fresh, healthy, delicious dinner AND not cook!  Yes, I warmed things up and put them together, but it doesn’t get any easier than this.  And the BBQ rubbed chicken from the other night, along with the red sauce (salsa) from the avocado enchiladas and a hint of BBQ sauce, made this meal a meal to remember!

BBQ Chicken lettuce wraps with mangos and blueberries

The Verdict

10’s all around!!!!  Everyone loved the wraps. The kids had the tortillas and my husband and I had the lettuce.  I used two long romaine leaves for each wrap.  It was crunchy and delicious!  Everyone loved the BBQ sauce (less is more), mixed with the red sauce.  This is a great way to use the chicken in a new and novel way.  I will definitely make this again!

Allergy Work Arounds:

Gluten: Use corn tortillas or lettuce (the lettuce is REALLY good!)

Dairy: Omit cheese or use a cheese substitute that works for you. We use goat cheddar cheese instead of cheddar from cow’s milk

BBQ Chicken Wraps with Potato, Onions, Cheese, Bell Pepper and Left Over Salsa – Use Lettuce or Tortillas – with Mangos and Blueberries

Serves 2 Adults and 2 Kids + 2-3 lunches

BBQ Chicken Wraps

BBQ Chicken Wraps

Ingredients

½ C onions, diced

1 bell pepper, diced

1.75 lbs. BBQ chicken, cooked (hopefully made earlier in the week)

left over potatoes that were scooped and saved earlier in the week

left over salsa from earlier in the week

canola oil spray

8 tortillas or 8 lettuce wraps or a combination of both

1 C cheddar cheese (or preferred substitute)

Instructions

  1. Saute onions and bell pepper until tender.
  2. Add chicken, potatoes, and salsa until warm.
  3. Heat tortillas on a lightly sprayed griddle on medium heat, one minute a side.
  4. Stir cheese into chicken mixture.  Scoop ½ C of mixture into each tortilla or lettuce wrap
  5. Serve with some fruit on the side and revel in the fact that you can be rewarded for doing very little work!

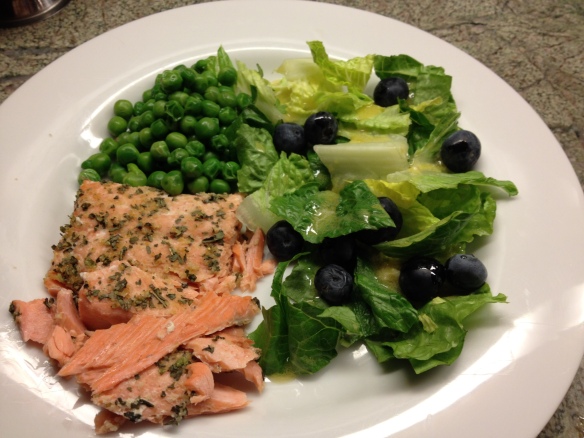
Baked Salmon With Basil and Garlic, Peas and Side Salad

Baked Salmon with Basil and Garlic, Peas and Side Salad

Our family loves salmon.  When my kids were little, I used to put some orange juice on top to “sweeten it up”, and a love of salmon was born.  Now, I often cook it “straight up” – nothing on it, and plates are always empty.  While you don’t need to add more flavor to something you already love, sometimes it is good to change things up a bit.  This is an easy way to add new flavors to an old favorite, very healthy, dinner.

I was using C salmon so my cooking time was more like 12-15 minutes.  Coho fillets are thinner but denser.  They don’t seem to need as much time cooking as Alaskan salmon.  Enjoy!  And if your family isn’t as into salmon as you’d like them to be, put this recipe aside and try baking the filets with 1/2 cup orange juice over the top — see if you don’t get some salmon converts after tasting that!

Recipes

Baked Salmon With Basil and Garlic

Serves 2 Adults and 2 Kids

Baked Salmon, Peas, and Side Salad

Ingredients

1 T garlic powder

1 t dried basil

1/2 teaspoon salt

1.75 lbs. salmon filets

canola oil spray

4 lemon wedges

Instructions

  1. Stir together the garlic powder, basil, and salt in a small bowl; rub in equal amounts on to the salmon fillets.
  2. Spray canola oil in baking dish and place salmon in dish. Cook salmon at 375 for about 15-20 minutes until fish springs back to touch or flakes easily with a fork.
  3.  While salmon is cooking, portion greens and make a side salad.
  4.  Warm peas in microwave.
  5.  When salmon is done, portion peas on each plate and serve each piece of salmon with a lemon wedge.

BBQ Chicken Rub, Potato Skins, and Green Beans

They say surrounding yourself with great people is a key element of success.  I agree. As such, I do not hesitate to research, use, and source great recipes for this blog. This particular recipe comes from Prinicpalchef.com.   The writer of Principalchef.com, a friend, superintendent and food aficionado, brings his family and friends together through easy, party-friendly recipes. I think you and your family will enjoy this meal – and the blog!

Pre-prep is key to this meal.  It’s not that it takes a long time, but the rub needs time to absorb into the chicken and the potatoes need an hour to cook – all work that can be done before dinner time meal prep.

Yesterday I readied the chicken and baked the potatoes.

Preparing the Chicken

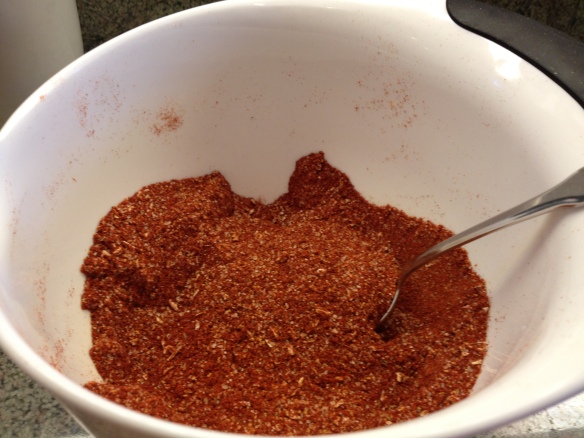
Making the Rub

Tonight I prepared the potato skins and baked the chicken. I also baked a little extra “unrubbed” chicken for lunches this week.

Baking the potatoes and chicken

The Verdict

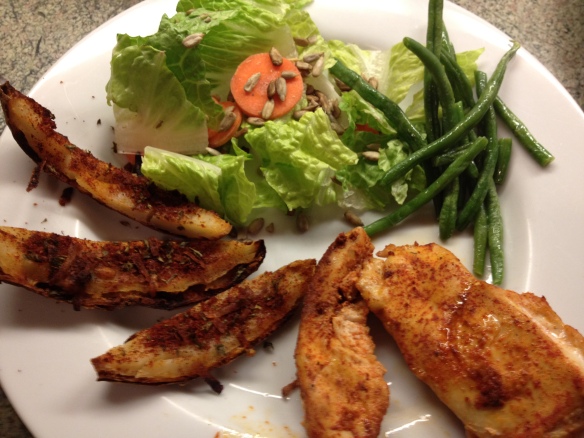
9.5’s and 10’s!  Everyone loved the flavor, even my discerning daughter.  The chicken was moist and flavorful. The potato skins were also flavorful and went well with the chicken.  Get the pre-prep done and dinner is a cinch!

Recipes

BBQ Chicken Rub, Potato Skins, and Green Beans

Serves 2 Adults and 2 Kids + 2-3 lunches

BBQ Chicken Rub, Potato Skins, and Green Beans

Ingredients

3 Idaho russet potatoes

canola oil spray

For the rub:

.       2 T Paprika (I used Penzey’s Smoked Paprika)

·        1/4 t  Ground Black Pepper

·         1 1/2 t  Kosher Salt

·         1 1/2 t  Sugar

·        1 1/2 t Chili Powder (Ancho Chili Powder is Very Nice)

·         3/4 t Garlic Powder

·         3/4 t Cup Onion Powder

·         pinch Cayenne Pepper (This is low heat – add more if you want it!)

For the Rest of the Meal:

1.75 lbs boneless skinless chicken breast

olive oil spray

1-2 cloves garlic, minced

salt, pepper, paprika

2 T grated parmesan (cow’s milk) or manchenga (sheep’s milk) cheese

1 T minced parsley

1 t chili powder

3 C fresh or frozen green beans

4 C salad greens

handful of sunflower seeds

1 carrot cut into disks

Make Ahead:

Potatoes – Make 1-2 days ahead of time.

Spray potatoes with canola oil spray.

Bake at 425 for 1 hour or until done – when a fork pierces potato easily

Set aside

Rub – Make up to 3 weeks ahead of time.

Mix all rub ingredients together.

Make Chicken – Make up to 1 day ahead of time.

Wash and dry chicken. Cut into 3” pieces. Make 3.5 lbs of chicken and you will have your chicken done for later in the week!

Massage rub into chicken. Wrap in plastic and store in refrigerator so chicken absorbs flavors of rub.

Instructions

Pre heat oven to 425

  1. Take chicken and leftover red sauce (salsa) out of refrigerator.
  2. Cut potatoes in half and scoop out centers leaving ¼ –  ½ “ layer of potato.
  3. Cut each ½ into 3 lengthwise strips.
  4. Place on baking sheet and spray insides of potato with olive oil spray.
  5. Top with garlic, paprika, parmesan or manchenga, parsley, and chili powder.
  6. Place chicken in lightly sprayed baking pan.
  7. Bake chicken for 20 -25 minutes.
  8. Add potato skins to oven for 10 minutes to heat through.
  9. Add 2 T lime juice,  ½ t kosher salt, and pepper to taste. Stir to blend.
  10. Place green beans in microwave safe container and microwave for 3 minutes or until done.
  11. Portion greens and salad topping for side salads. Top with no oil or low fat dressing.
  12. Plate chicken, green beans, and potatoes topped with salsa.
  13. Serve! Cowboy hats optional…

Pre-Prep Opportunities

2. Combine spices and store in a dry place until ready to use.

3. Make the spice rub for tomorrow.

4. Wash and dry chicken for the week.  Rub in spices, wrap in wax paper, and store in refrigerator until tomorrow so chicken can absorb the flavor.

Avocado and Cashew Enchiladas with Mild Red Sauce and Side Salad

Avocado and Cashew Enchilada with Mild Red Sauce and Mango and Blueberries

Just when you think you have it figured out, someone changes the rules. Last week I was raving that my kids were not missing the meat in my vegetarian meals.  This week, they missed the meat! The Avocado and Cashew Enchiladas were quite good, but the food was so soft it lacked texture – my kids liked the flavor but needed a psychological proxy for meat.  Black beans or kidney beans, butternut squash chunks, more coarsely chopped cashews, peas – something to “chew on” – would have been beneficial additions.  I do think I will make these again, but will experiment with adding different “meat textures”. Do you have any ideas? Please reply and share!

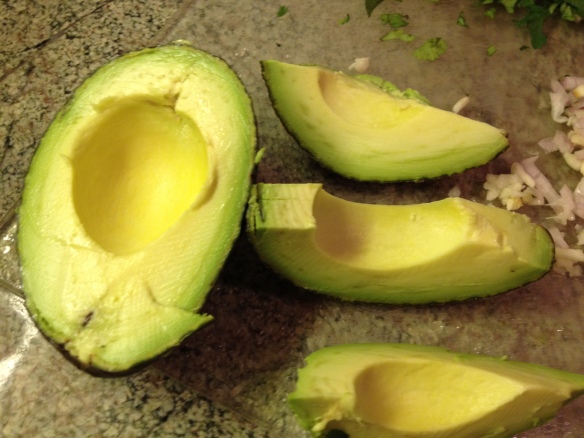
Avocado

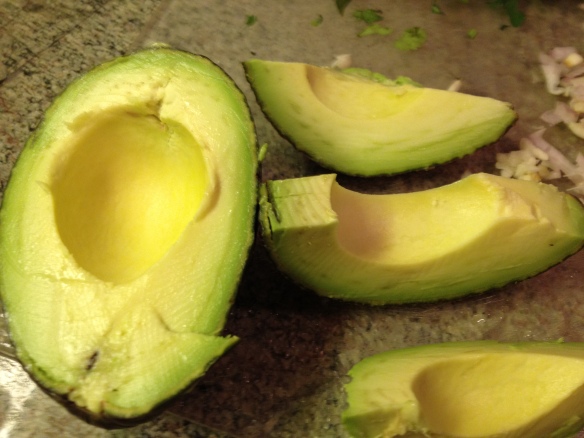
You might be thinking that this meal is too high in fat / calories.  But this recipe only calls for 2 avocados for 4 servings. Avocados often get a bad rap because of their fat content.  However it is the very nature of the avocado’s fat content that makes it a heart healthy food with anti-inflammatory properties.  Avocados are also considered a “nutrient-rich” food and help with the absorption of important anti-oxidants.  Not all fat is the same…

The Verdict

The kids rated the meal an 8.  They thought with some chicken, the meal would be a 10.  My husband and I both gave the meal a 9.5 and did not have any “meat withdrawals…”

Avocado and Cashew Enchiladas with Mild Red Sauce

Getting Ahead

Tonight is the night to get ahead for the week. While the enchiladas were baking, I rubbed the week’s chicken with the BBQ rub in tomorrow’s recipe and while we ate I baked it.  I also baked the potatoes that will be used on Tuesday and Thursday. Prioritizing healthy home cooked meals for my family is easier some days than others. I think tomorrow will be easy!

Recipe

Avocado and Cashew Enchiladas with Mild Red Sauce and Side Salad

Serves 2 Adults and 2 Kids

Ingredients

For the Red Sauce:

1 lb. tomatoes, cut in chunks

2 bell peppers, cut in chunks

2 onions, cut into chunks

2 large cloves garlic

½ t salt

¼ t cumin

1/8 t black pepper

3 T lime juice

1/4 c cilantro

1/4 t chopped jalapeno pepper (optional)

For the Enchiladas:

2 medium sized avocados – ripe

juice from 1 lemon

1 medium tomato, seeded and chopped

4 finely minced scallions

½ C finely minced cilantro (or parsley if cilantro is not for you)

1 C finely chopped cashews, toasted

1/3 C plain yogurt

1 medium clove garlic

1/8 t salt

canola oil spray

8 corn tortillas (or flour if corn is not for you)

Instructions

Pre Heat Oven 325

  1. Make the red sauce OR buy enchilada sauce or salsa.
    1. If making red sauce, combine all sauce ingredients in food processor and puree.
    2. Make the Enchilada filling
      1. Mash avocados until smooth. Add lemon juice to prevent browning.
      2. Add remaining ingredients through salt.  Mix well.
      3. Make Enchiladas
        1. Pour a small amount of sauce in the bottom of the lightly sprayed baking pan.
        2. Heat griddle and lightly spray with canola oil.
        3. Place tortillas on griddle and heat 1 minutes on each side.
        4. Scoop ½ C avocado mixture  on to tortilla in a line.
        5. Roll tortilla and place in a lightly sprayed baking dish.
        6. Repeat 7 times.
        7. Pour remaining sauce over enchiladas.
        8. Place baking dish in oven for 30 minutes.
        9. While enchiladas are cooking, portion greens and make a small side salad on each plate. Top with no oil or low fat salad dressing.
        10. Serve 1-2 enchiladas per plate and serve!

March 12-15 Weekly Menu, Recipes and Shopping List, Tested March 5-8

Menu

Monday: Avocado and Cashew Enchiladas with mild red sauce and a side of fruit

Tuesday: BBQ Chicken Rub, potato skins, and green beans

Wednesday: Baked Salmon, Peas, and side salad

Thursday: BBQ Chicken wraps with potato, onions, cheese, bell pepper and left over salsa – use lettuce or tortillas, with mangos and blueberries


Themes for the week:  Rubs and pre-prep.  Getting dinner ready ahead of time, when you have time to squeeze it in will make your meals taste better and make dinner prep a lot less stressful this week. I found inspiration for this week’s menu on principalchef.com. There are several recipes that look delicious and easy.  I am always looking for fresh ideas.  and have never used a rub in a recipe on this blog. When I saw this recipe, which looked delicious, I had to try it.  I’m happy to say, the recipe didn’t disappoint.  Stay tuned and I will tell you more next week.

Recipe

Avocado and Cashew Enchiladas with mild red sauce

Serves 2 Adults and 2 Kids + 1 lunch

Ingredients

For the Red Sauce (salsa):

1 lb. tomatoes, cut in chunks

2 bell peppers, cut in chunks

2 onions, cut into chunks

2 large cloves garlic

½ t salt

¼ t cumin

1/8 t black pepper

3 T lime juice

1/4 c cilantro

1/4 t chopped jalapeno pepper (optional)

For the Enchiladas:

2 medium sized avocados – ripe

juice from 1 lemon

2 medium tomatoes, seeded and coarsely chopped

4 finely minced scallions

½ C finely minced cilantro (or parsley if cilantro is not for you)

1 C finely chopped cashews, toasted

1/3 C plain yogurt

1 medium clove garlic

1/8 t salt

canola oil spray

8 corn tortillas (or flour if corn is not for you)

Instructions

Pre Heat Oven 325

  1. Make the red sauce OR buy enchilada sauce or salsa.
    1. If making red sauce, combine all sauce ingredients in food processor and puree.
    2. Make the Enchilada filling
      1. Mash avocados until smooth. Add lemon juice to prevent browning.
      2. Add remaining ingredients through salt.  Mix well.
      3. Make Enchiladas
        1. Pour a small amount of sauce in the bottom of the lightly sprayed baking pan.
        2. Heat griddle and lightly spray with canola oil.
        3. Place tortillas on griddle and heat 1 minutes on each side.
        4. Scoop ½ C avocado mixture onto tortilla in a line.
        5. Roll tortilla and place in a lightly sprayed baking dish.
        6. Repeat 7 times.
        7. Pour remaining sauce over enchiladas.
        8. Place baking dish in oven for 30 minutes.
        9. Pop in Potatoes for tomorrows dinner.  You will need to leave them in 30 minutes longer than the enchiladas to make sure they are cooked through. (When they are done, store in refrigerator until next day when you prepare dinner)
        10. While enchiladas are cooking, prepare a side of fruit or make a salad.
        11. Prepare the rub for the chicken tomorrow, wash and dry the chicken for the week, rub in the spice rub, wrap in wax paper and store in the refrigerator until next day.
        12. Serve 1-2 enchiladas per plate and serve!

Pre-Prep Opportunities

1. For the red sauce:  Cut the tomato, pepper, and onion ahead of time and store in the refrigerator.

2. Combine spices and store in a dry place until ready to use.

3. Make the spice rub for tomorrow.

4. Wash and dry chicken for the week.  Rub in spices, wrap in wax paper, and store in refrigerator until tomorrow so chicken can absorb the flavor.

Recipes

BBQ Chicken Rub, Potato Skins, and Green Beans

Serves 2 Adults and 2 Kids + 2-3 lunches

Ingredients

3 Idaho russet potatoes

canola oil spray

For the rub:

.       2 T Paprika (I used Penzey’s Smoked Paprika)

·        1/4 t  Ground Black Pepper

·         1 1/2 t  Kosher Salt

·         1 1/2 t  Sugar

·        1 1/2 t Chili Powder (Ancho Chili Powder is Very Nice)

·         3/4 t Garlic Powder

·         3/4 t Cup Onion Powder

·         pinch Cayenne Pepper (This is low heat – add more if you want it!)

For the Rest of the Meal:

1.75 lbs boneless skinless chicken breast

olive oil spray

1-2 cloves garlic, minced

salt, pepper, paprika

2 T grated parmesan (cow’s milk) or manchenga (sheep’s milk) cheese

1 T minced parsley

1 t chili powder

3 C fresh or frozen green beans
Make Ahead:

Potatoes – Make 1-2 days ahead of time.

Spray potatoes with canola oil spray.

Bake at 425 for 1 hour or until done – when a fork pierces potato easily

Set aside

Rub – Make up to 3 weeks ahead of trime.

Mix all rub ingredients together.

Make Chicken – Make up to 1 day ahead of time.

Wash and dry chicken. Cut into 3” pieces. Make 3.5 lbs of chicken and you will have your chicken done for later in the week!

Massage rub into chicken. Wrap in plastic and store in refrigerator so chicken absorbs flavors of rub.

Instructions

Pre heat oven to 425

  1. Take chicken and leftover red sauce (salsa) out of refrigerator.
  2. Cut potatoes in half and scoop out centers leaving ¼ –  ½ “ layer of potato.
  3. Cut each ½ into 3 lengthwise strips.
  4. Place on baking sheet and spray insides of potato with olive oil spray.
  5. Top with garlic, paprika, parmesan or manchenga, parsley, and chili powder.
  6. Place chicken in lightly sprayed baking pan.
  7. Bake chicken for 20 -25 minutes.
  8. Add potato skins to oven for 10 minutes to heat through.
  9. Add 2 T lime juice,  ½ t kosher salt, and pepper to taste. Stir to blend.
  10. Place green beans in microwave safe container and microwave for 3 minutes or until done.
  11. Plate chicken, green beans, and potatoes topped with salsa.
  12. Serve! Cowboy hats optional…

Pre-Prep Opportunities

2. Combine spices and store in a dry place until ready to use.

3. Make the spice rub for tomorrow.

4. Wash and dry chicken for the week.  Rub in spices, wrap in wax paper, and store in refrigerator until tomorrow so chicken can absorb the flavor.

Recipes

Baked Salmon With Basil and Garlic

Serves 2 Adults and 2 Kids

Baked Salmon, Peas, and Side Salad

Ingredients

1 T garlic powder

1 t dried basil

1/2 teaspoon salt

1.75 lbs. Salmon

canola oil spray

4 lemon wedges

Instructions

  1. Stir together the garlic powder, basil, and salt in a small bowl; rub in equal amounts onto the salmon fillets.
  2. Spray canola oil in baking dish and place salmon in dish. Cook salmon at 375 for about 15-20 minutes until fish springs back to touch or flakes easily with a fork.
  3.  While salmon is cooking, portion greens and make a side salad.
  4.  Warm peas in microwave.
  5.  When salmon is done, portion peas on each plate and serve each piece of salmon with a lemon wedge.

Recipe

BBQ Chicken wraps with potato, onions, cheese, bell pepper and left over salsa – use lettuce or tortillas

Serves 2 Adults and 2 Kids + 2-3 lunches

BBQ Chicken Wraps

Ingredients

½ C onions, diced

1 bell pepper, diced

1.75 lbs. BBQ chicken, cooked (hopefully made earlier in the week)

left over potatoes that were scooped and saved earlier in the week

left over salsa from earlier in the week

canola oil spray

8 tortillas or 8 lettuce wraps or a combination of both

1 C cheddar cheese (or preferred substitute)

Instructions

  1. Saute onions and bell pepper until tender.
  2. Add chicken, potatoes, and salsa until warm.
  3. Heat tortillas on a lightly sprayed griddle on medium heat, one minute a side.
  4. Stir cheese into chicken mixture.  Scoop ½ C of mixture into each tortilla or lettuce wrap
  5. Serve with some fruit on the side and revel in the fact that you can be rewarded for doing very little work!

Shopping List

Entrees

3.5 lbs. boneless skinless chicken breast

1.75 lbs. salmon

Fruit

2 limes

2 lemons

4-8 sturdy lettuce leaves for chicken wraps

1 mango

1 pint blueberries

Vegetables

4 C lettuce/ greens

3 potatoes

5 cloves garlic

1.75 lbs. Tomatoes (1 lb. + 4)

3 bell peppers

3 onions

¼ t jalapeño pepper (optional)

2 ripe avocados

4 scallions

1 bunch cilantro

Dry Goods

Canola oil spray

Olive oil spray

2-3 T Barbecue sauce (hopefully you have an opened bottle in your refrigerator.)

2 T  C smoked paprika

¼ t paprika

1/2 t + a little black pepper

1 1/2 t kosher salt

1 1/2 t  white sugar

1 1/2 t   + 1 t chili powder or ancho chili powder

3/4 t + 1 T garlic powder

3/4 t onion powder

pinch cayenne

¼ t cumin

1 C cashews

4-8 tortillas

8 corn tortillas

1 T dried basil

1 T minced parsley

Dairy

1 T grated parmesan or manchenga cheese

1/3 C plain yogurt (cow, goat or sheep milk or preferred substitute)

1 C cheddar cheese (or preferred substitute)

Frozen

3 C green beans
3 C peas

Chicken Stir Fry with Vegetables over Brown Rice and Side Salad

Chicken Stir Fry with Vegetables and Brown Rice

When I was little my uncle took my sister and I to an ice cream parlor and ordered us “The Kitchen Sink”.  We thought that was a hilarious name and happily ate our way into oblivion.   It was a crazy mix of ice creams and toppings – probably what was in great abundance or ice creams that needed to be finished off.

Chicken stir fry with vegetables was my “kitchen sink” this week.  I used all my leftover vegetables, which makes me smile as I have a real aversion to throwing away food.  I am quite liberal with what qualifies as “stir fry” food, which keeps the stir fry fresh and novel.  Serve it with brown rice (made ahead of time), quinoa, or regular rice.  Add a side salad, and you will end up with a potpourri of tasty vegetables on your plate!

The Verdict

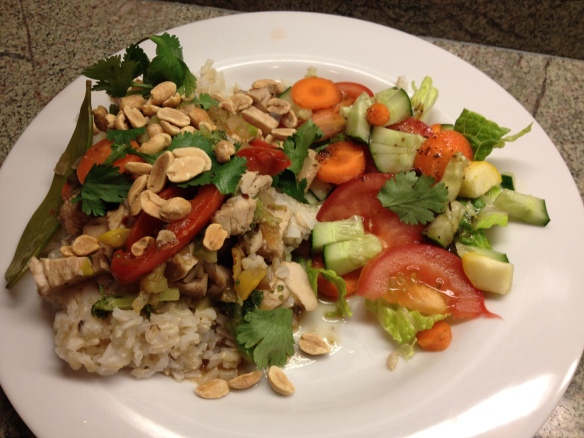
9’s and 10’s!  Judges included the regular family members and a guest.  My toughest grader, my youngest daughter, rated it a 9, my son a 9.5 and my husband and guest a 10. This is an easy recipe to put together at the end of a long week, and the nice thing is that it will probably turn out a bit different every time, depending on what is leftover or available in your refrigerator!

Chicken Stir Fry with Vegetables and Brown Rice

Recipe

Chicken Stir Fry with Vegetables over Brown Rice and Side Salad

Serves 2 Adults and 2 Kids + 2 Lunches

Chicken Stir Fry and Side Salad

Ingredients

1.75 lbs. boneless skinless chicken breast, cooked – baked in teriyaki sauce.

1.5 C broccoli, cut into small pieces

2 carrots, cut into thin rounds

1 yellow squash, diced

1 onion, diced (or buy pre-chopped)

1/4 C Braggs Liquid Amino Acids

left over snow peas and bell pepper and left over sauce

1 C peanuts, roasted, unsalted


Make Ahead:

1. Make brown rice according to package directions.

Instructions

1. If you weren’t able to make brown rice ahead of time (and this is often the case with me), make white rice or quinoa according to package directions. You can make this a day ahead of time – you just have to be organized… Not always my strong suit…

2. Pull cooked chicken out of the refrigerator. Hopefully chicken was cooked when you made the teriyaki chicken earlier in the week. If not, see Teriyaki Chicken recipe to make chicken.

2. Cut chicken into bite-sized pieces.

3.  Portion a small salad on each plate, and top with some of the squash, carrots, and some cucumber and a tomato.  Drizzle no oil or low fat salad dressing.

3. Put broccoli, carrots, squash, and onion in a Wok or large sauté pan, lightly sprayed with canola oil spray. Pour in Braggs Liquid Amino Acids. Cook until just tender.

3.  Add chicken to warm.

4. Add bell peppers and snow peas with their sauce to warm.

5. Serve stir fry mixture over brown rice and top with peanuts (optional).

Pre Prep Opportunities

1. Make brown rice ahead of time. Store in refrigerator until ready to use.

2. Make and cut the chicken ahead of time. Store in refrigerator until ready to use.

3. Prepare all vegetables ahead of time and store in refrigerator so they are ready to go into the Wok or large sauté pan.

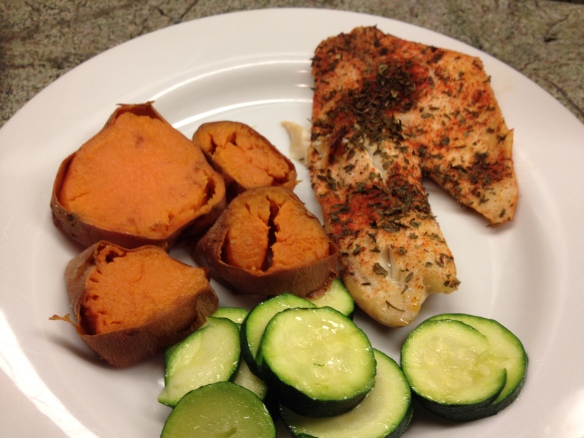
Baked Lemon-Garlic Tilapia, Yam Rounds, Zucchini

tilapia

Synergy achieves something higher, better, not achievable by the individual parts. 1 + 1 = 3. It’s like putting an outfit together using ordinary accessories and creating the “Wow!” factor. If the pieces aren’t working together, you may not get that ‘second look’ as you walk down the street…

That is what happened with tonight’s dinner.  Each part was delicious.  The family LOVED the tilapia, LOVED the Yams, and the kids did not reject the zucchini. (That is a good thing.) But the meal didn’t work together to produce the “degustation” that gets the oohs and ahhhs of an amazing meal. Between you and me, it was the seasoning of the yams that got in the way.  I flavored them the way I usually do with cinnamon and a few drips of maple syrup.  It was delicious but didn’t add to the synergy of the meal. It felt like it belonged to a different meal.

I got started on this meal a day ahead when I cooked the yams in the oven for about an hour.  I stored them in the refrigerator until I was ready to use them.  Making the tilapia was very easy.  I rinsed the fish and patted dry.  I poured the lemon juice on top of the fish, sprinkled on the spices, and placed in the oven. While the tilapia was cooking, I cut the yams into rounds, sprinkled cinnamon and drizzled a bit of maple syrup and warmed in the microwave.  Next I cut the zucchini and quickly sautéed in a pan lightly sprayed with olive oil.  I sprinkled a pinch of salt on top.  I plated everything and served.

The Verdict

As I mentioned, everyone loved the components of the meal.  But as my daughter deftly, or not so deftly, pointed out, “I like everything, but it doesn’t go together.” The easy fix: season the yams with something more savory. Perhaps just a pinch of salt. I think the cinnamon and maple take away from the dish at large.  Or substitute the yams with a different vegetable.    Lesson learned: Think Synergy!

Recipe

Baked Lemon-Garlic Tilapia, Yam Rounds, Zucchini

Serves 2 Adults and 2 Kids

Baked Lemon Garlic Tilapia, Yam Rounds and Zucchini

Baked Lemon Garlic Tilapia, Yam Rounds and Zucchini

Ingredients

2 yams

1.75 lbs. tilapia fillets

3 T fresh lemon juice

1 t basil

1 t dried parsley flakes

1 t paprika

1 t dried thyme

1/2 t salt + a pinch

2 zucchini

pepper to taste

Make Ahead

1. Bake yams in 350 oven for 45 minutes or until easily pierced with a fork. If time has passed you by on this one, and that has happened to me more than once, pull a frozen vegetable out of the freezer and cook that in the microwave.

Instructions

Pre heat oven to 375
1. Lightly spray a roasting pan.

2. Measure out and combine spices.

3. Place tilapia in pan, and pour lemon juice on top, followed by spices.

4. Place in oven for 20-30 minutes or until tilapia cracks and springs back to the touch.

5. Consider making the brown rice for tomorrow…

6. While tilapia is cooking, slice zucchini, place in a sauté pan lightly sprayed with canola oil and sauté until just tender. Add 1/2 T butter or vegetable based margarine on zucchini and sprinkle one pinch of salt.

7. Cut yams into 1/2″ rounds.  sprinkle two pinches of salt on top – just enough to catch the taste buds, and warm in the microwave for 45 seconds – 1 minute or until just cooked through.

8.  Plate yams, zucchini and fish and serve!


Pre Prep Opportunities

1. Make the yams earlier in the week and store in the refrigerator.

2. Cut zucchini and store in refrigerator until ready to use.

3. Pre-measure spices for fish and store in an airtight container until ready to use.

Pasta and Vegetable Gratin and Side Salad

I have been serving one vegetarian meal a week for the last few months. In the beginning, my kids were asking, “Why?”  (Meaning, why would I serve a meal with out meat?!)  I explained the benefits to their bodies and their planet.  They looked at me like I was crazy but indulged me and now they are getting used to this routine. They don’t ask where the meat is.  They are actually enjoying the vegetarian dinners and tonight was another win.  Pasta Vegetable Gratin is a healthy twist on mac n cheese that will have your whole family smiling.

My dinner prep began by making the pasta.  As the pasta cooked, I moved to the frozen broccoli (because it was easier than cutting fresh broccoli), cooked it in the microwave and cut it into very small, maybe even unrecognizable, pieces.  Next I warmed the frozen peas in the microwave, diced the yellow squash, and set the veggies aside.

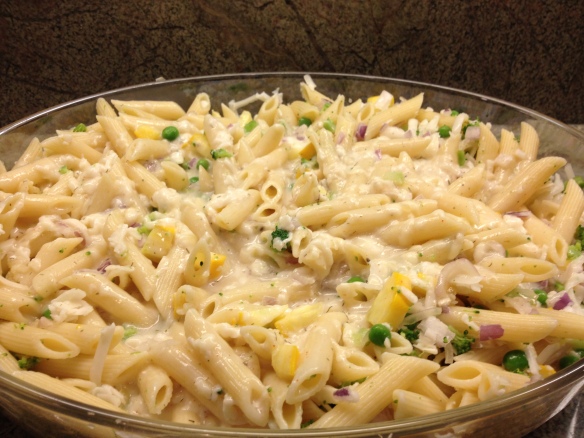
When the pasta was done, I drained it and placed it in a lightly sprayed roasting dish, adding the peas, broccoli, and squash on top and mixing them into the pasta.  Lastly, I sprinkled the cheese on top and lightly stirred into the pasta.

Then it was time to make the sauce. First I melted the butter in the sauce pan. Then I stirred in flour for about a minute and then added the milk.  After bringing the mixture to a boil I mixed in the parmesan/manchenga cheese and the spices, and poured it over the pasta.

Due to an cow’s milk allergy in my house I used coconut milk drink instead. (This is not coconut milk that comes in a can. This is called coconut milk drink – it is an alternative to cow’s milk and comes in a shelf stable container and is usually displayed near the milk.)  It is a great alternative and doesn’t have a “coconut” taste.  However, it is a bit runnier than regular milk.  I should have added less. The recipe calls for 2 1/4 C of milk.  When I make this again and use coconut milk drink, I will only use about 1 3/4 C.

Cooking Frozen Broccoli

Making the Pasta

Chopped Broccoli and Peas

Mixing Vegetables into Pasta

Sprinkling the Cheese

Casserole Ready for Oven

I baked the casserole for 30 minutes and served.

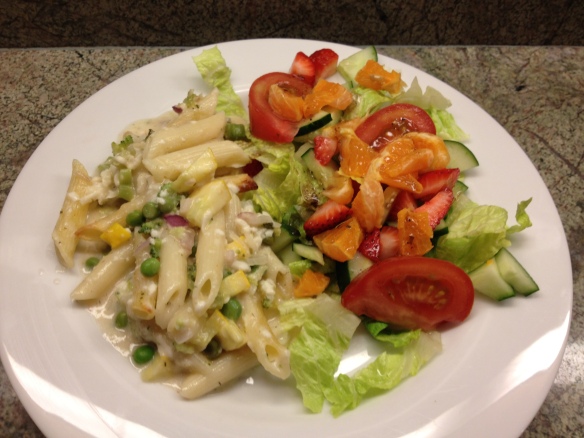
Pasta and Vegetable Gratin and Side Salad for 4

The Verdict

Pasta and vegetable gratin is a winner! My son rated the dish a 9.5, my husband a 10 (and he likes his meat…) and my toughest critic, my daughter, rated it a 9.  The flavors blend nicely and the coconut milk drink just blended right in. I forgot to put the breadcrumbs (no surprise…) on top but everyone liked it just the same.  It would probably enhance the flavor so if you are not opposed to gluten, add the bread crumbs when you make this vegetarian dish that non-vegetarians will love!
Recipe 

Pasta and Vegetable Gratin and Side Salad

Serves 2 Adults and 2 Kids for 2 meals or 1 meal and lunches

Pasta and Vegetable Gratin with Side Salad

Ingredients

16 oz. penne pasta

1 yellow squash, diced

1 bell pepper, diced

2 scallions, finely diced

1 C frozen peas

1.5 C fresh or frozen broccoli

1 clove garlic, minced

1 C sharp cheddar cheese, grated

1 T butter or plant-based margarine

1 T unbleached flour

2 1/4 C milk or 2 C coconut milk drink (original flavor)

1/4 C grated parmesan (cow’s milk) or manchenga (sheep’s milk) cheese

1/8 t nutmeg

1/4 t dill

1/2 t salt

1/4 t paprika

pinch cayenne pepper

pepper to taste

2 T bread crumbs

Instructions

1. Cook pasta al dente. Pour into shallow baking dish.

2. Stir all vegetables, including garlic. into pasta.

3. Sprinkle cheese on top and lightly mix in.

4.  Melt butter in sauce pan.  Stir in flour, let bubble and whisk until it turns beige.  Stir for about a minute.
5.  Add milk. Bring to a boil, stirring constantly.

5. Remove from heat and stir in cheese and spices.

6. Pour sauce over pasta mixture and stir slightly.  Sprinkle on bread crumbs.

7. Bake 30 minutes or until bubbly and brown on top. Consider baking the yams for tomorrow at the same time.

8. Serve and see if you miss the meat in this hearty vegetarian dish!

Pre Prep Opportunities

1.  Cook pasta ahead of time and store in refrigerator.

2. Dice all vegetables ahead and store in the refrigerator or buy pre chopped.

3. Prepare recipe through step 3 and store in refrigerator until ready to make the sauce.